Proxmox on Surface Pro 4
Create a low power consumption Proxmox server using repurposed Surface Pro 4 to run your homelab without needing your own powerstation

Last Updated: June 17th, 2022
By: Steve
Contents
Why Would You Want To Run Proxmox on a Surface Pro 4?
For many people the idea of running a server system such as Proxmox on an old beast like a Surface Pro 4 is just nuts. But bear with me – there’s a use case for which the SP4 is actually excellent when running Proxmox VE.
For a while now I’ve been dabbling around with homelabbing. I bought, perhaps foolishly, a decommissioned Dell PowerEdge R710. Actually, I still love that machine – it’s an absolute beast. But, and this is a big but, with the latest increases in power bills it’s costing me just way way too much to operate. Even with the various energy saving tweaks I’ve made to it.
I was looking for a low power demand system which would do the following;
- Run my Plex Media Server. Preferably with hardware transcoding so different devices could watch at the same time, even across the broadband connection.
- Run my Zoneminder cameras (3 of them) – this is actually why the R710 is too power hungry. These need 24 hour runtime whereas the other stuff could potentially be run on demand.
- Run the WordPress backends for my websites that use Gatsby to generate static sites. Such as indeed the site you’re reading this on right now. I could throw these onto a VULTR VM but I do like the isolation I get by running these on my own isolated LAN.
- Run the Github Action Runners which generate the Gatsby sites.
- Run a MinIO Server (kind of like self-hosted Amazon S3 service) to allow serving disk space on the LAN to other servers for backups etc.
The Dell PowerEdge R710 was running at around 160 watts idle, 180 watts when ZoneMinder was in use – which was 24/7. And around 280 watts when the Gatsby sites were being rebuilt. Which isn’t all that often, but still.
At a unit (KwH) rate of around £0.30 now, and running at approx. 4.5KwH per day, that’s costing roughly £1.30 per day to run on the R710. Nearly £40 per month, or £480 per year. For 24 cores that are rarely actually required.
I decided I needed to reduce my power consumption.
Surface Pro 4. Low Power Consumption. Still a Capable Plex Server – and More.
So I thought I’d give a Surface Pro 4 a go at running Proxmox. To my surprise it installed without a single hitch. There’s absolutely no need to run the Surface kernel – though you probably could if you wanted. That’s because in my case I’m using a cheap, spares or repairs Surface Pro 4 I picked up on eBay. Mine was £25. The screen was missing.
It runs at about 20 watts for most of the day, stepping up to around 33 watts when it’s building the websites. That’s around half a unit (KwH) per day. Which is approx. £0.15 per day. Which is £4.50 per month.
That’s a 10x saving!!
It’s not as powerful as the R710 under load by any means. But it does serve everything I need it to. Building the websites takes about 7 minutes now versus 3 (only 4 cores instead of 24). But, it runs Plex with transcoding considerably better because it supports hardware transcoding using the Intel GPU. Possibly I could actually use the GPU for ZoneMinder too.
Proxmox On Surface Pro 4. Low Power Consumption But Still Capable
So, how have I done it?
I should point out that I use all LXC containers on my Surface Pro 4 on Proxmox. I do have a couple of KVM Virtual Machines running Windows but these are very very rarely switched on. It’s fair to say the R710 ran the Windows VMs FAR better. But it would. It has 24 CPU threads, and 48Gigs of RAM. The Surface Pro has 4 threads and 8Gigs of RAM.

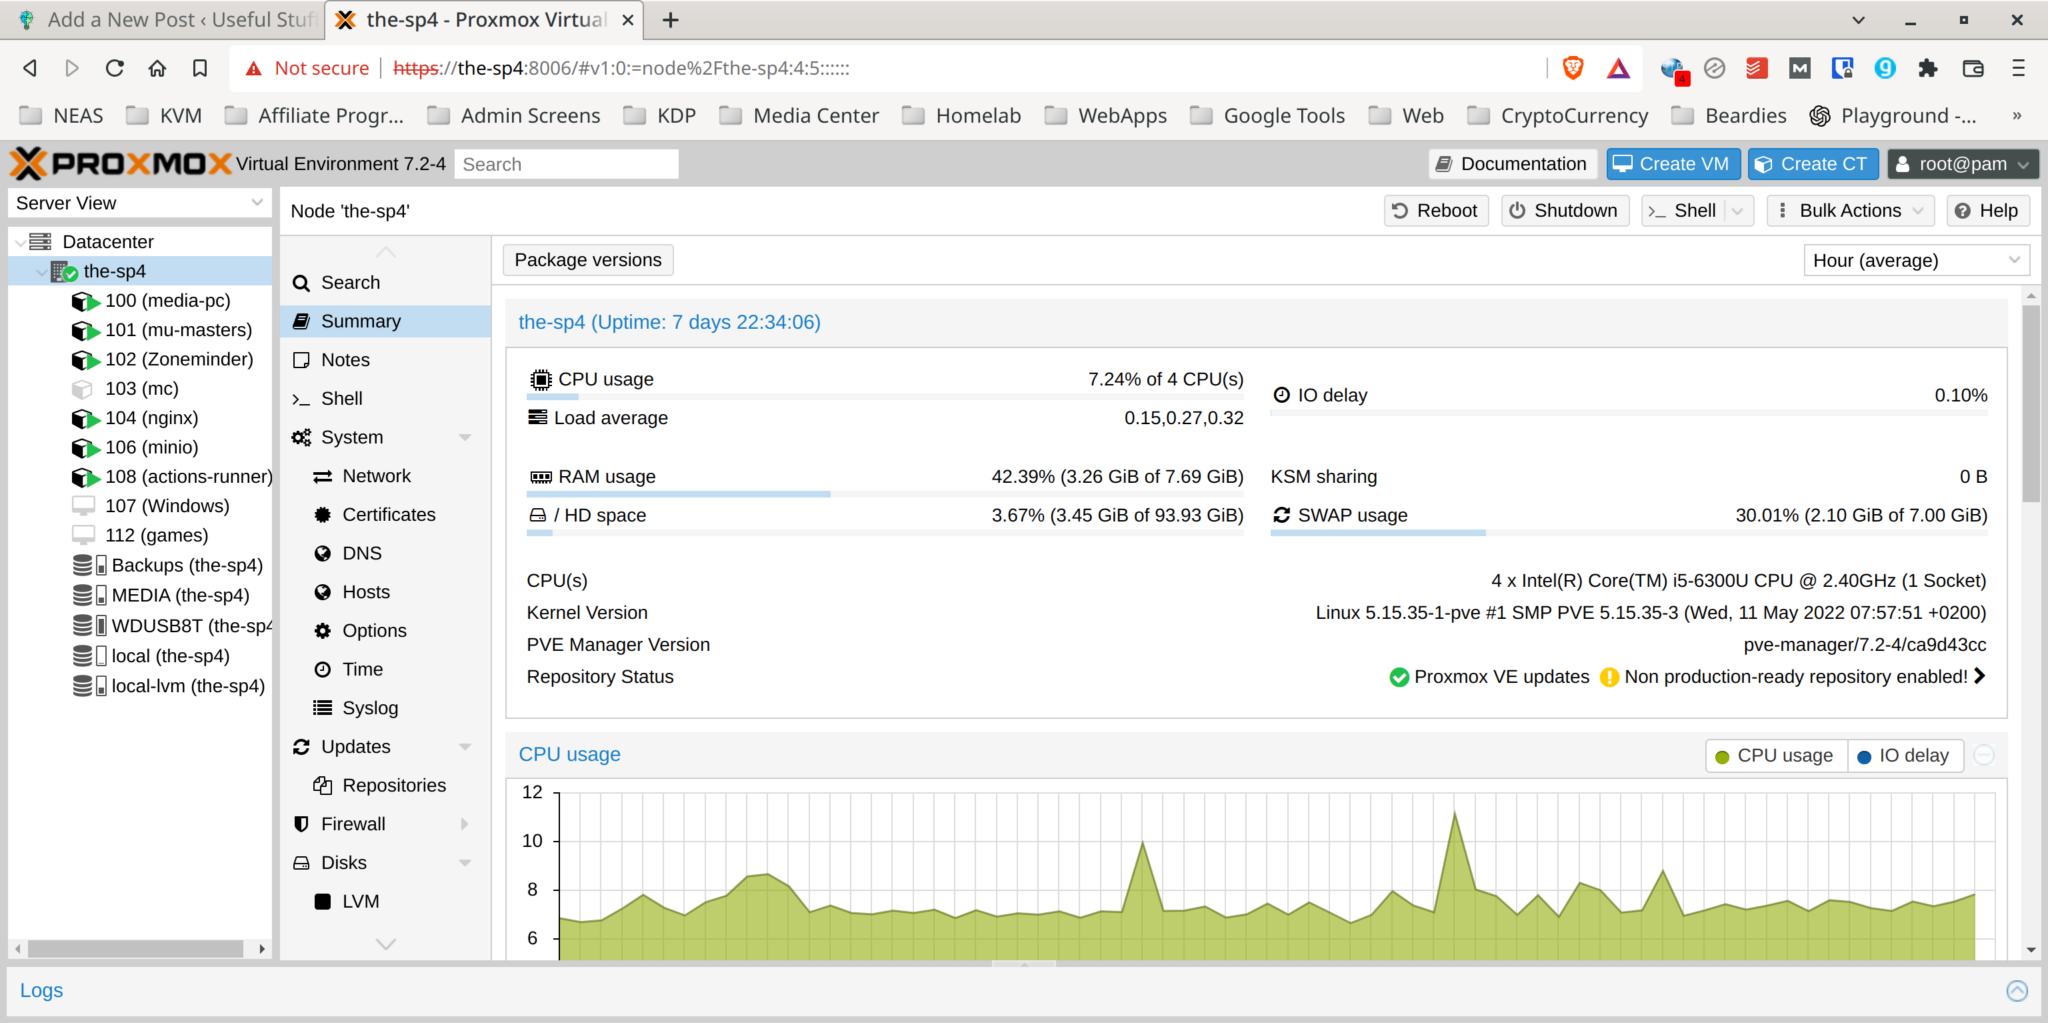
You can see the load it’s under though, which isn’t all that much. That’s a pretty typical snapshot of how it performs throughout the day. And it doesn’t shift all that much even when two people are watching different shows on Plex.
There’s some things I’ve learned along the way though.
Make Sure Any External USB3 Hard Drive is CMR Not SMR
This may very well not be all that important if you’re not writing to the disk all that often.
Initially, I had a Western Digital 4TB My Passport USB3 disk hooked up and running all the external storage. The load average, and the IO Delay were enormous most of the time. I thought initially it was a crappy USB3 hub, but after much reading I discovered that actually, the WD My Passport is what’s known as an SMR configuration.
I don’t get the technical details of it all, but in order to increase capacity, there’s some funky stuff goes on whereby the data is stored much closer together on the surface of the disk. This means that when an area of the disk is written to, the adjacent areas must be re-written as well in order to prevent data loss. The normal CMR system doesn’t need this extra write process – but doesn’t store data as densely.
For normal useage this really isn’t all that much of a problem because most of the time it’s relatively small amounts of data that are written only once in a while. But on Proxmox, when you’re using Zoneminder and Plex – along with Sonarr or Radarr – there’s data being written to the disk almost constantly.
I still use this disk in my system, but it now only gets written to overnight when my other servers use it to back up to. Switching to the 8T Western Digital Elements Desktop solved the problem.
A full list of CMR and SMR disks by Western Digital is here.
Use a GOOD USB3 Hub or the Surface Pro Docking Station
You’ll need to use a USB3 Hub because the Surface Pro 4 comes with only 1 USB port. Setting up Proxmox will require a keyboard (and a mouse makes it easier too), which means that you’ll have no room for both of those and any external disks. It’s likely – especially if you are using Plex Media Server that you’ll want some external storage.
I also chose a USB hub that has an ethernet connector because you’ll find it difficult to set up wireless with Proxmox – since it’s meant to be a server and servers don’t really like wireless connections. I’m not going to get into how to set up PVE to use wireless because I’ve never done it.
The first hub I used was a cheapie from eBay. It worked OK while the disk was running really slowly (see above) but once I fixed that and the disks were running optimally, the cheap USB hub kept dropping out. This meant I lost access to the disks and the ethernet and only powering down the SP4 would fix it.
I ended up splashing out a bit and buying the dedicated docking station specifically for the Surface Pro. Surface Pro 3 Docking Stations are available, refurbished, on Amazon here. Note that although they say they’re Surface Pro 3 docks, they work properly with the Surface Pro 4 too. I’ve had no problems since doing this, the connection is rock solid and the ethernet connection is fast, as is the disk access.
Setup Plex to Use Hardware Transcoding On Surface Pro 4
If you’re going to run Plex Media Server on the Surface Pro 4 with Proxmox then you’re almost certainly going to want to use hardware transcoding, as doing it on the CPU will quickly bog the machine down for any other tasks you might want it to be doing at the same time.
Fortunately if you’re using LXC it’s straight forward to do, and you can even pass through the GPU to multiple different containers if you want or need to. This is in contrast to passing through a GPU to a QEMU/KVM Virtual Machine which requires dedicated and sole access to the resource thereafter.
However, you will need to make sure your LXC is a Privileged Container. Unprivileged containers will not work.
To get this working, simply set up a new privileged container, in whichever configuration you want. I set mine up as a Debian 11 LXC and then installed Docker so I could run the Linuxserver Plex Docker container within.
Before you switch the container on though, you’ll need to manually edit the configuration file. Get console (or SSH) access to the Proxmox host. Then edit the LXC configuration file. In my case – as you can see from the screenshot earlier in the post, the ID of my LXC is 100, but you’ll need to substitute your LXC ID in the commands below;
cd /etc/pve/lxc
nano 100.conf
Then add the following lines at the bottom;
lxc.cgroup2.devices.allow: c 226:0 rwm
lxc.cgroup2.devices.allow: c 226:128 rwm
lxc.cgroup2.devices.allow: c 29:0 rwm
lxc.mount.entry: /dev/dri dev/dri none bind,optional,create=dir
lxc.mount.entry: /dev/fb0 dev/fb0 none bind,optional,create=file
You’ll also need the following in your docker-compose.yml files on the Plex Media Server LXC
devices:
      - /dev/dri:/dev/dri
You should find, if all went well, that the device will be already setup within the LXC. I suspect you can use the same technique to pass hardware transcoding devices to Jellyfin if you’re using that instead of Plex, but I’ve not tried it myself.
Summary
Running Proxmox on a Surface Pro 4 is a really energy efficient way of creating a Virtualisation Platform that doesn’t break the bank. Surface Pro 4’s are often listed on eBay for spares or repairs, usually with busted up screens – and you can plug in an external screen using a mini display port cable to get Proxmox installed. Once it’s installed you won’t need a screen anymore.
Being spares or repairs, these Surface Pro 4’s often go quite cheaply.
I’d recommend getting one with at least 8Gigabytes of RAM though, as 4 is going to be quite tight, unless you just want a couple of fairly light LXCs installed.
Even with 2 external hard drives (one of which requires its own power supply) my total draw at idle is around 20 watts. It would be less still if I wasn’t running Zoneminder.
It’s cost effective and it keeps another Surface Pro 4 out of landfill.
I hope you’ve enjoyed this post. Please feel free to share it with your friends using the buttons below if you think it was useful. Give me a yell using the comment form below if you have any questions or other suggestions.
Thanks for reading!


