HP Command Center Not Working Properly
In this post I explain how to fix the HP Command Center not working properly on Windows 10 or 11. (Tested on W10)
Last Updated: January 13th, 2022
By: Steve
Contents
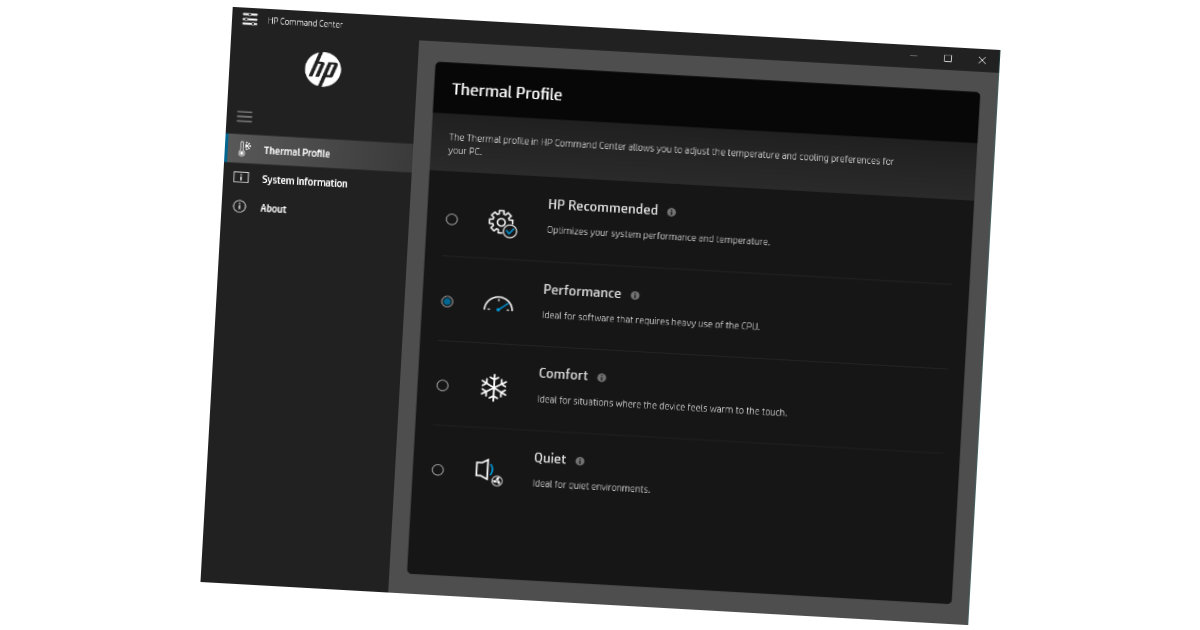
If you’re the proud owner of an HP Laptop that comes with the HP Command Center which is used to adjust fan speeds according to your liking (I like to keep mine cool at the expense of some additional noise for example) but when you open it up the Thermal Profile is missing, or for some other reason the HP Command Center is not working properly then this post might help you.
If you do some research into this problem on the Internet, most places will tell you to download the HP Command Center from the Microsoft Store. This is particularly helpful if you’ve just re-installed your laptop and don’t have the HP software installed of course – and is a worthy answer in many cases.
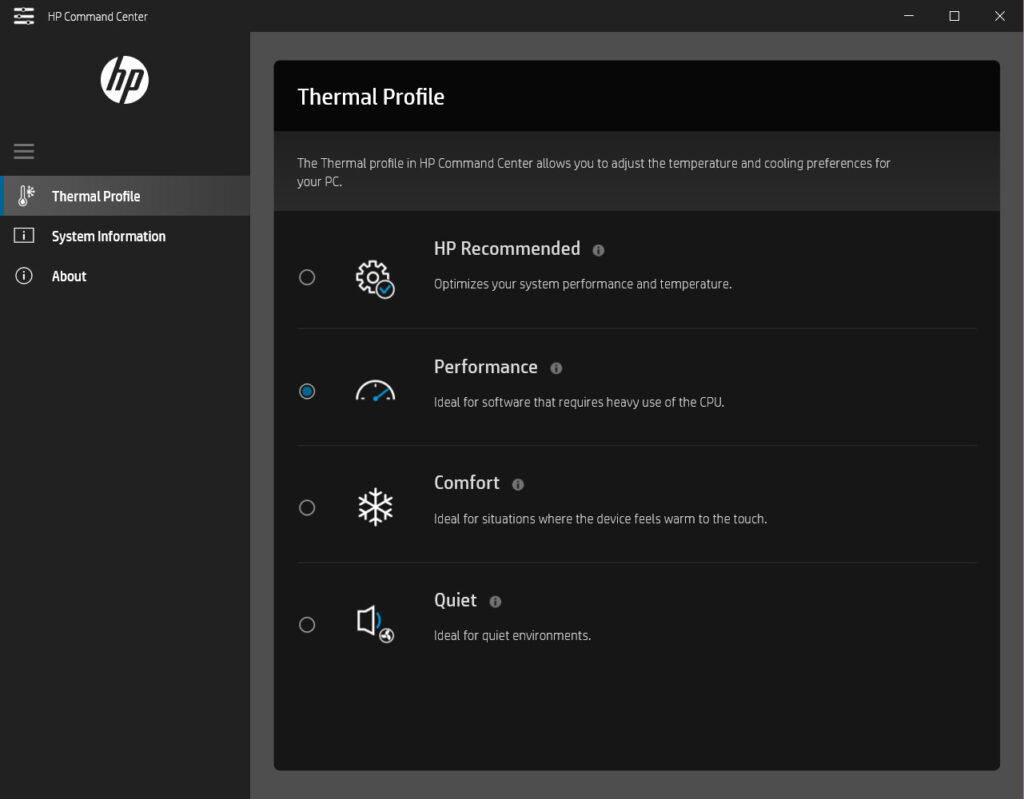
But what if you already downloaded the HP Command Center – and indeed you can even start it but when you do there is no Thermal Profile tab, and the System Information tab shows you hardly anything.
Check Services.msc to See if The HP Service is Running
So, quite by accident I discovered that there’s a bunch of HP Services running under Windows 10. Or at least, they’re meant to be. I have ‘optimised’ my Windows installation by turning off a bunch of services using Chris Titus Tech’s Debloat Script which is actually really good and gives me a noticeable boost in Windows responsiveness.
But to do so it turns off various services (among other things) so it may be that you’ve turned off the service that the HP Command Center requires to be able to get the information it needs properly.
To switch it back on, for the HP Command Center you need to run the Services Snap In from Microsoft.
Press the Windows key on your keyboard and start typing services – you should then see a screen as below;
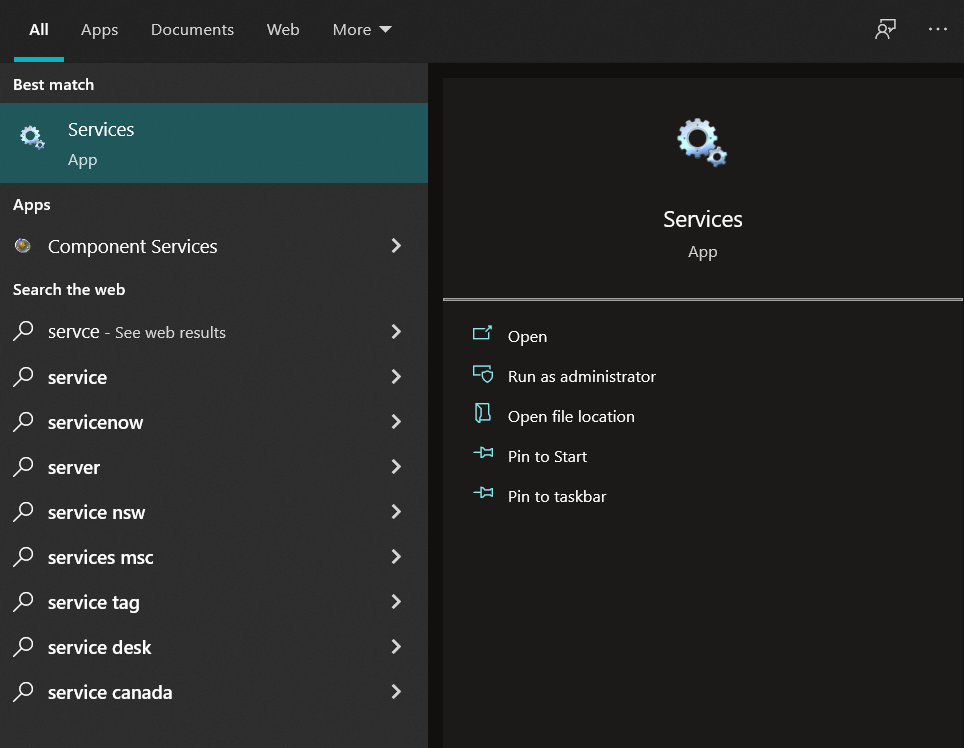
Click the Services app icon and look for the HP System Info HSA Service. If this is set to manual and doesn’t show ‘Running’ in the status column then you’ll need to start it to get the relevant information across to the HP Command Center.
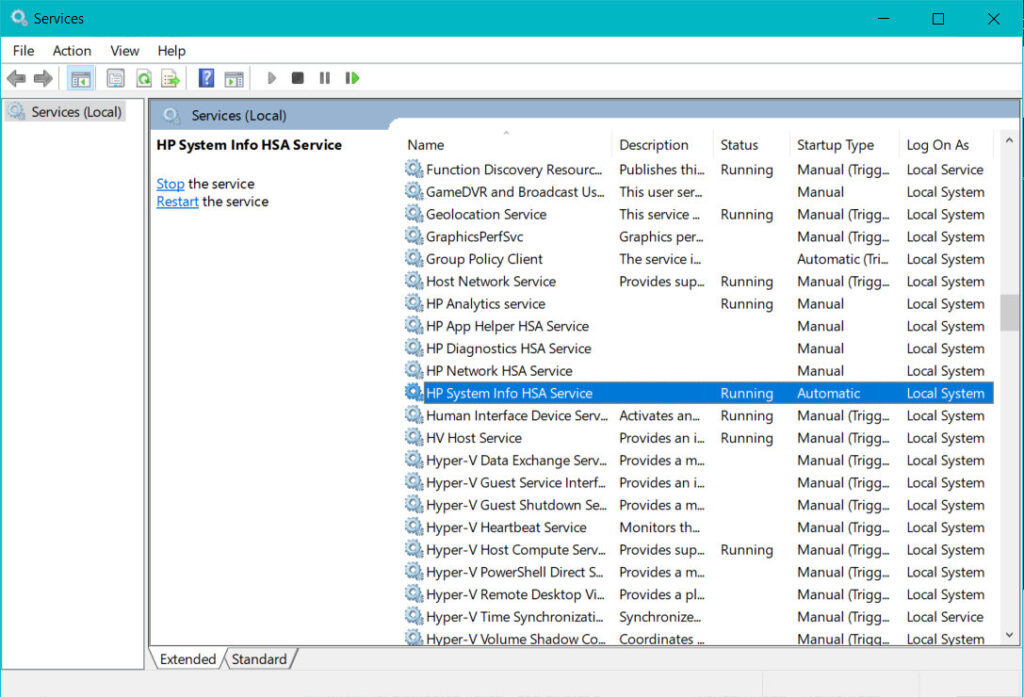
Using the mouse, hover over the service line, right click and then choose Start from the contextual menu that pops up. Once the service shows as Running in the status column, close the HP Command Center and re-open it and you should now see the system information fully filled in and once again see the Thermal Profile tab where you can change how you want your fans to respond to system load.
Making It Permanent
In order to make the change permanent you’ll need to set the Startup Type for the service to Automatic from Manual. To do this, return to the Services Snap In and find the HP System Info HSA Service again. Right click but this time choose Properties. Then change the Startup Type option to Automatic from Manual. Click OK and you should be good to go.
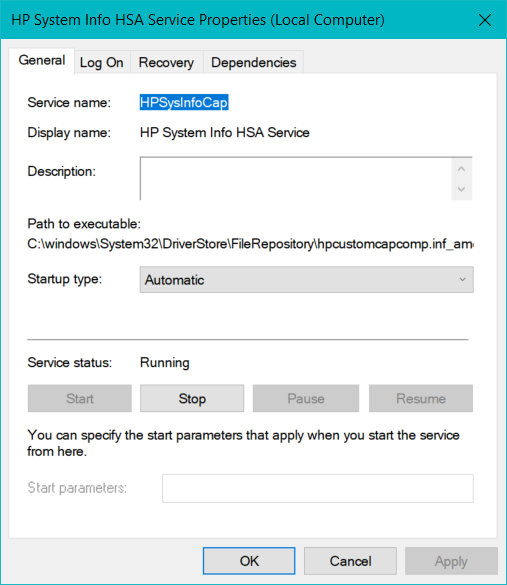
And having done that – the HP Command Center starts working again! Yay! Proper fan control once again.
Incidentally, if someone could get this working nicely on Linux that would be one less reason for me to use this laptop on Windows 🙂 Thanks in advance!
If you’ve found this post helpful please feel free to share it using the buttons below. If you have any comments or questions, feel free to leave a comment using the form below.
Thanks for reading, hope that was most useful! See you next time.


